Affiliate System is one of the important features through which seller can have additional revenue for their products and at the same time affiliate users will get some commission from the sellers after the sales and unique clicks. Affiliate program is an essential factor for every big marketplace and now for the Opencart Marketplace, we have our own Affiliate System called Opencart Marketplace Affiliate System.
With Opencart Marketplace Affiliate System, user(affiliate) will receive commission based on Unique Clicks and sales. Seller can manage the Affiliate system from their end and admin will supervise overall system.
Since it’s an add-on for the Opencart Marketplace Module, so marketplace module must be installed before installing the Opencart Marketplace Affiliate System.
Features
- Enable/disable affiliate system by admin.
- Choose the commission rate type to be Fixed Or Percentage.
- Admin can choose various payment methods.
- Allow seller to set Per unique click rate, Commission rate in Fixed or Percentage and Payout Settings.
- Allow seller to send mail to the affiliates.
- Allow seller to create text banners.
- Allow seller to Unapprove/Delete/Edit their banners.
- Allow seller to see affiliate summary with payment method.
- Allow admin to approve/delete/edit affiliate users.
- Allow admin to send mail to the affiliate users.
- Allow admin to see Traffic, All Clicks, Unique Click.
- Allow admin to see monthly or yearly sales/traffic.
- Allow admin to see affiliate payments.
Installation & Configuration
Installation of the module is very easy. You just need to drag your admin & catalog folder file into the Opencart root folder and it will be installed.

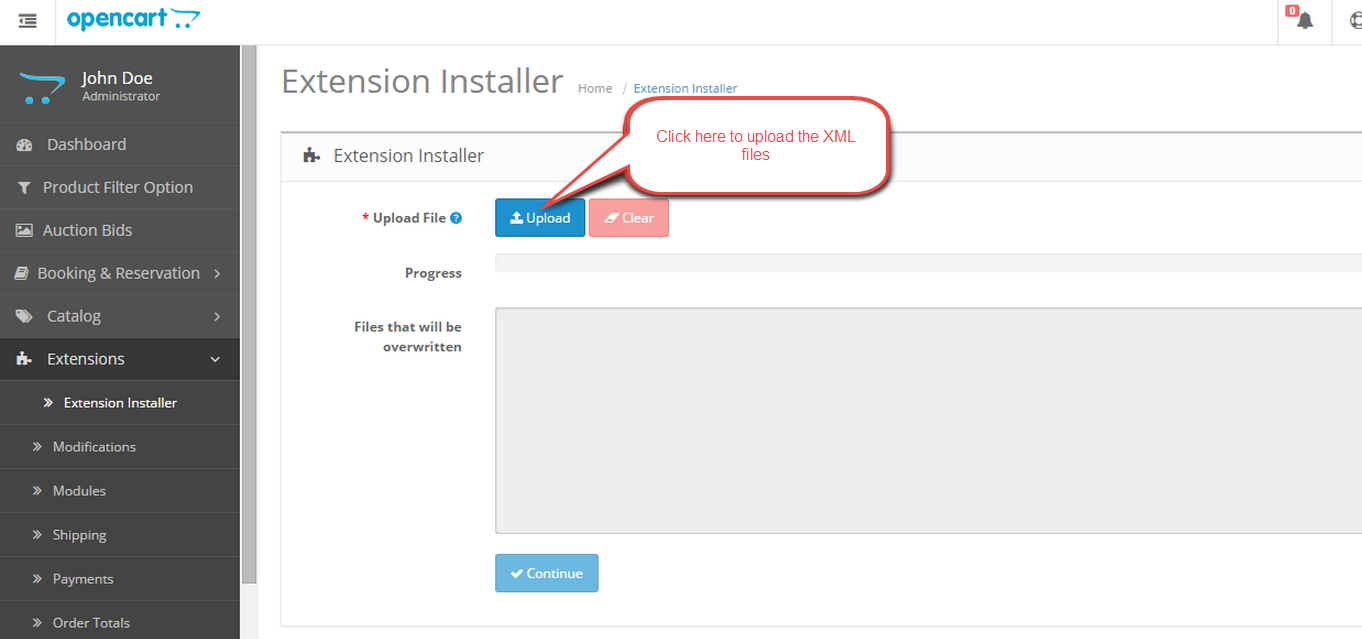
You can also install the Opencart Marketplace Affiliate System module by uploading the admin & catalog files through extension installer.

Admin have to install the XML file through the extension installer.
Now, under Extension > Modules, Install the Opencart Marketplace Affiliate System like this way.

After the module installation, admin will click on edit button and then a new page will come. On this page, admin will enable the module as per the below image.

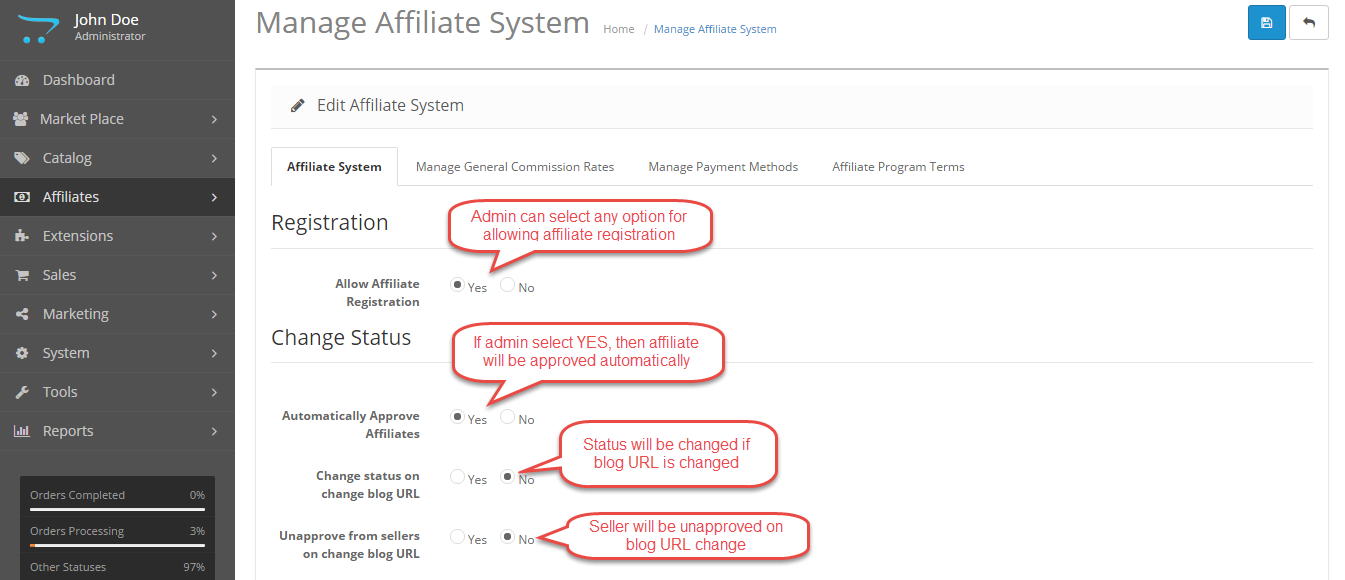
After enabling the module, admin can see the “Affiliates” option on the side bar at the dashboard. Now admin will do the configuration of this module.
Affiliate System: In this admin will select radio buttons for affiliate registration and change status for affiliate approval, change in blog URL and unapproval of sellers on chaning blog URL.
Manage general Commission rates: In this admin will enter value for per unique Click and the commission rates in percent and in fixed amount.

Manage Payment methods: In this admin will select various payment methods through which payment can be done. Admin will also provide the email address for sending mails to the affiliate.

Affiliate Program Terms: In this admin will provide the terms and condition, which any user will accept at the time of affiliate registration.

Front-End Management
After the module installation and configuration, user can see the Affiliate registration link on the footer like the image below.

When the user will click on the Affiliate registration link, then a form will appear, where user will provide all the details for becoming an Affiliate User.

When the user will complete the registration, then they can see Affiliate Panel block like the image below.

Here, affiliate user can see seller(s), total clicks, total sales, total balance and total commission received by the seller.

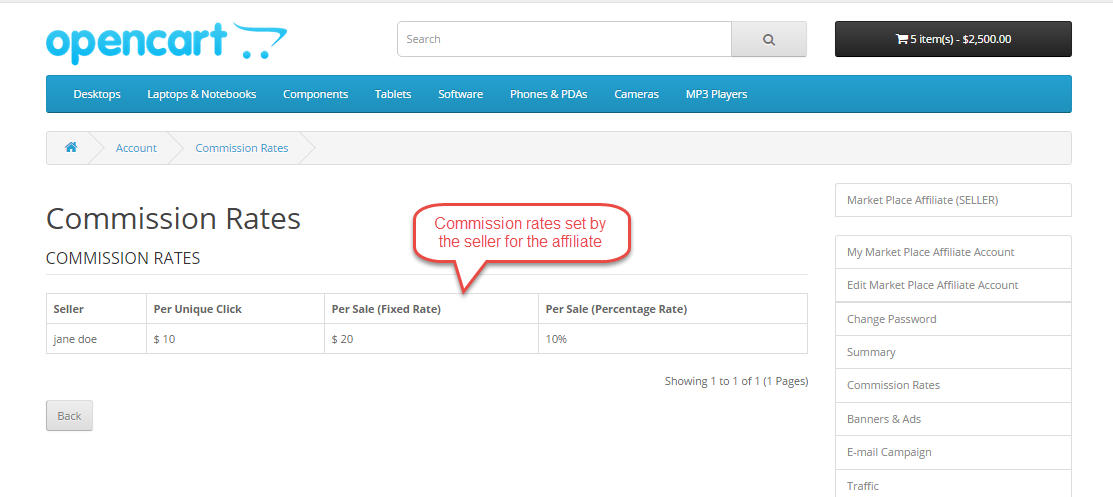
Here Affiliate user can see the commission rates provided by the seller in fixed and in percent.
Under Banners & Ads, affiliate user can see the seller’s Banner and ads. An affiliate user can apply this banner by copying the HTML code and paste it on the website where they want to display the products. When any user clicks on the banner or purchase these products then, affiliate user will be rewarded for its unique click. When any user buys this affiliate product then affiliate user will get the commission only when the order is completed.
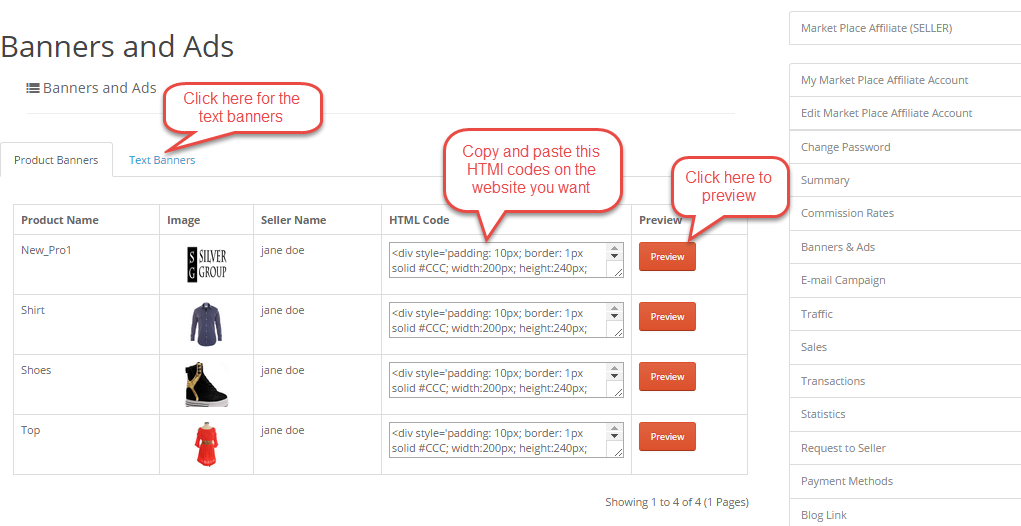
Text Ads:After clicking on Text Ads link, affiliate user can see the Text ads.

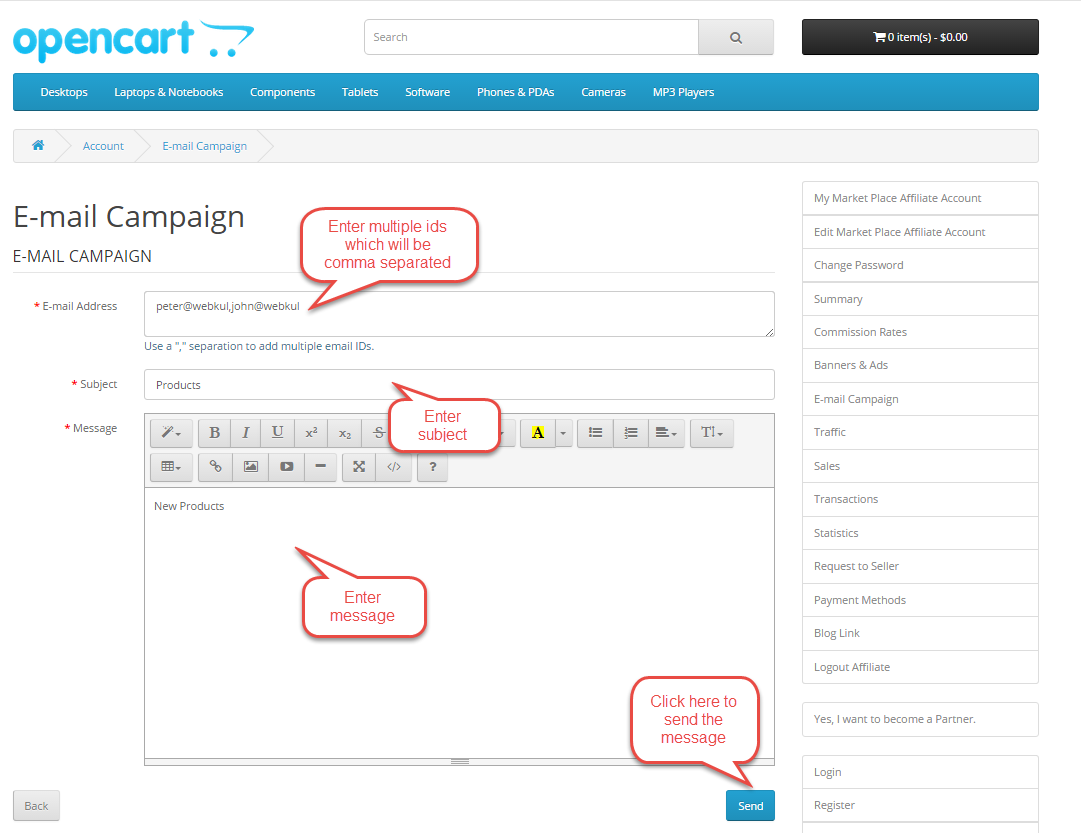
Here Affiliate user can send mail to the multiple Ids with the message and subject.
Here Affiliate user can see the traffic for “All Clicks” and “Unique CLicks”. In “All Clicks”, affiliate can see IP address, referring URL, product link, product type and date.

Unique Clicks: Unique Clicks occurs when any user click on the banner or ad for the first time on the referral website. In this, affiliate can also see see IP address, referring URL, product link, product type and date.

In sales, affiliate user can see total commission, status of the order, price of the product and seller’s name.

Under Transaction, affiliate user can see remaining balance amount and paid amount from the seller(s). Affiliate user can also view the payment method for each transaction.
![]()
From here, affiliate user can track their performance in the form of a graph. They can view the graph by day, week, month and year.

Affiliate user can send their request to the seller and can see the status of their request. They can also see the blog link and seller’s email address.

Under Payment Methods, Affiliate user can set their payment methods using Cheque, Bank Transfer, Paypal Standard Payment.

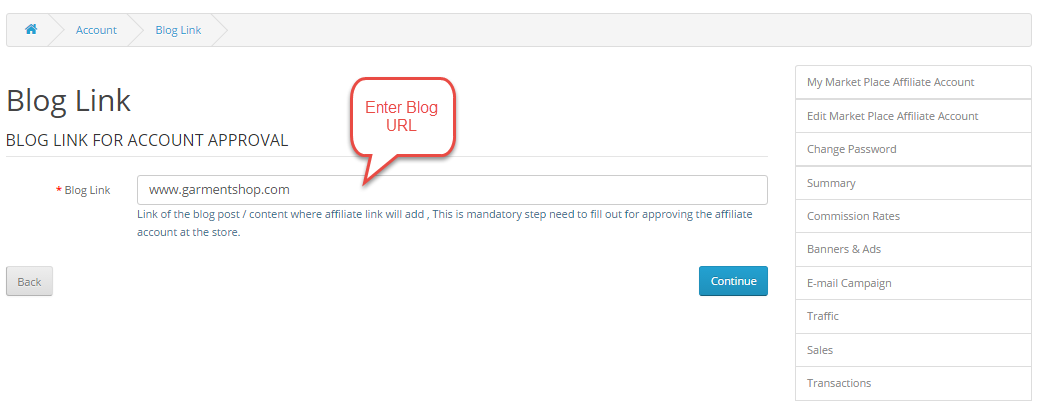
Affiliate user will add blog link where they want to display the banners and ads of the seller.
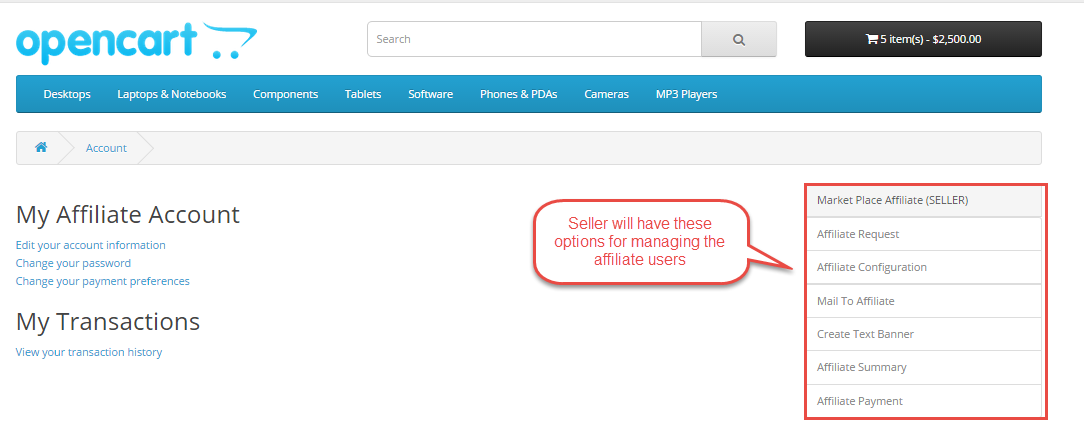
Seller Management
The seller will see new fields on the marketplace dashboard and with the help of these options, seller will manage the affiliate users.
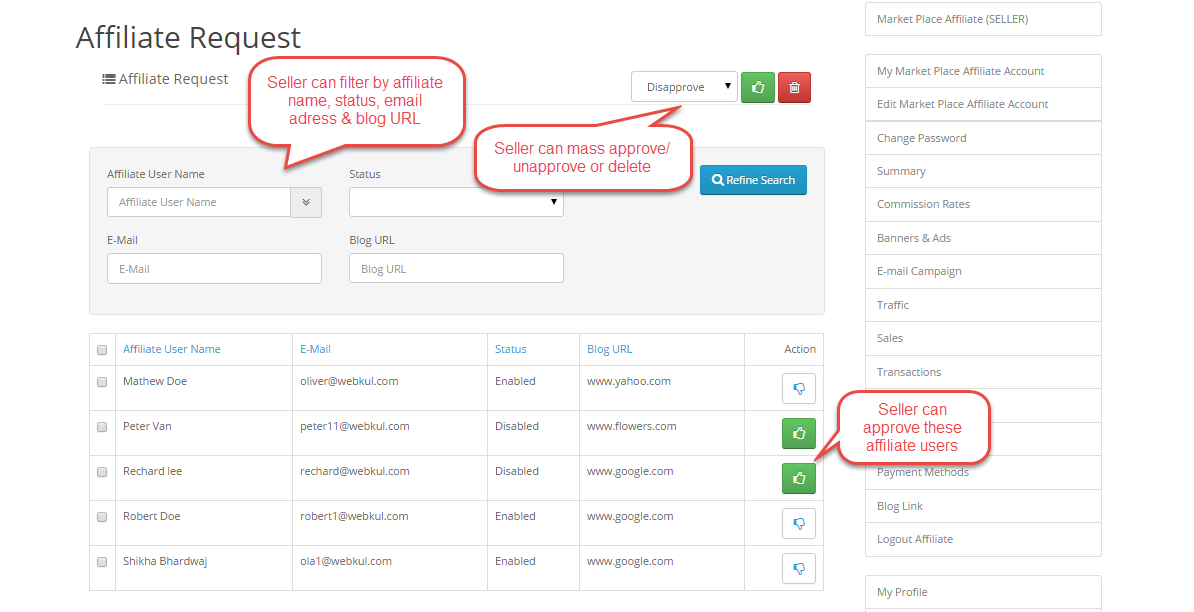
Here seller can various affiliate user with their email address. There is option for approving or disapproving the affiliate users. Seller can even filter the affiliate users.
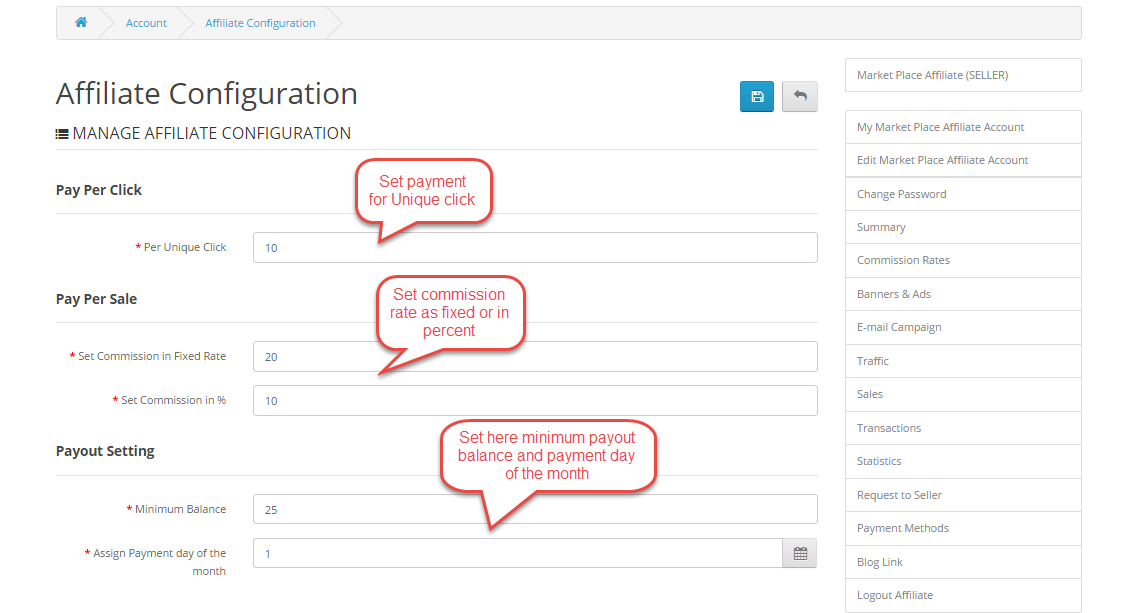
Here seller will enter the value for the unique click, provide the commission rates in fixed and in percent. Seller will set the minimum payout balance and set the payment day for the affiliate.
Here seller can send mails to affiliate users as per the image below.

Here seller can create new text banner and also edit/delete/unapprove the text banners. Seller can preview the created banner as well.

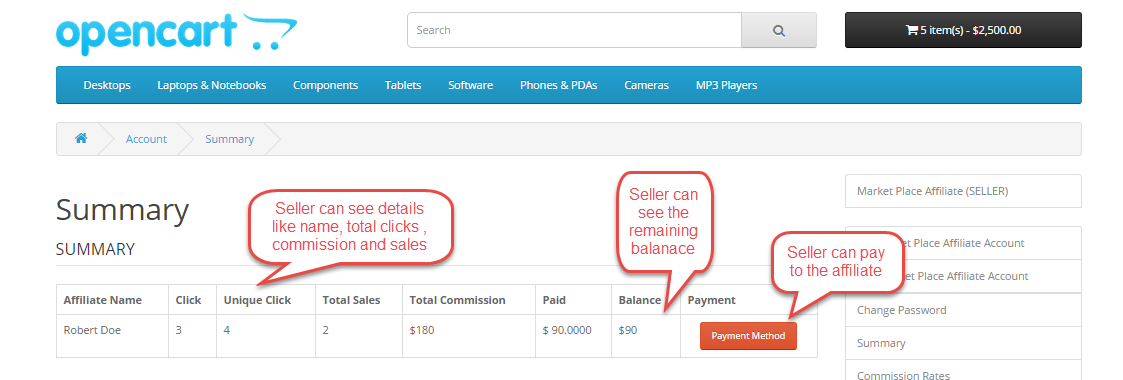
Here seller can see the affiliate user details like Unique click, Total Sale, Total Commission, Paid, Balance, Payment method.
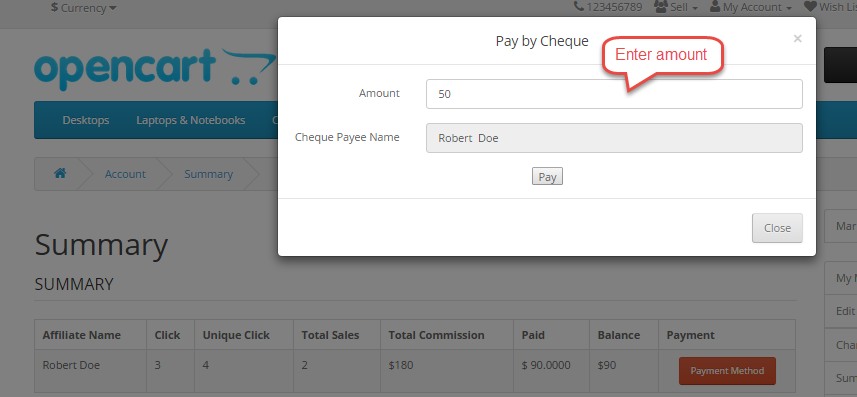
When seller will click on “Payment Method”, then a pop-up will come up with fields for entering amount, affiliate name like the image below.
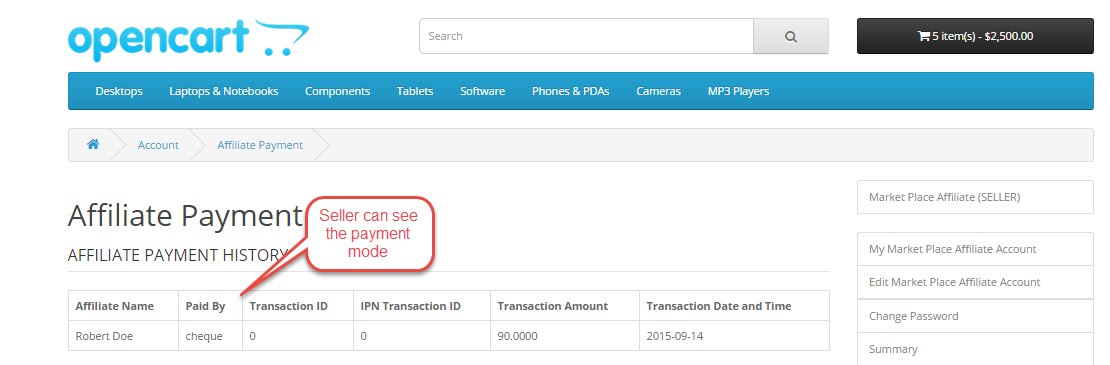
Here seller can see payment history along with various details.
Admin management
After the successful installation of this module, a new menu “Affiliate” will be added in the Admin panel. Refer to the screenshot for the same.

Here admin can manage the affiliate users by editing their details, unapproving them. Admin can filter the affiliate user from the above filter block as well. Admin can view details like blog url, email address, status, name.

When the admin will click on Payment Details, then a new page will come up where admin will choose the payment method, enter Tax ID.

Here admin can send mails to affiliates.

Here admin can view details like Affiliate name, referring URL, date.

Here admin can view details like order status, Affiliate order from blog, Order amount, name.

In this section, admin can view name, email address and view option.

On clicking on “View” option, admin will be re-directed to a new page where admin can view amount paid, affiliate name and seller’s name.

Here admin can view the total and unique clicks in the graphical form.

For any kind of technical assistance, just raise a ticket at : http://webkul.com/ticket/ and for any doubt contact us at support@webkul.com