WordPress WooCommerce Marketplace Stripe Connect works with checkout payment gateway. This Plugin can be run in both test and live mode. In this seller has to connect using stripe connect.
It is an ad-don of WordPress WooCommerce Marketplace. To use this module
you must have installed WooCommerce and Marketplace first.
Features
- Working with stripe supported currencies.
- Better Security as given by Oauth (Open standard for authorization). For creating token when receiving card details, so that no information of card could be received by our own server.
- Email notification on transaction.
- Support for almost all kind of cards including Visa, Mastercard, American Express, Discover, etc.
- Well integrated with WordPress WooCommerce Markeplace
- No Modification required in core files.
- Check and utilized both Test and Live server modes on the payment gateway.
Installation
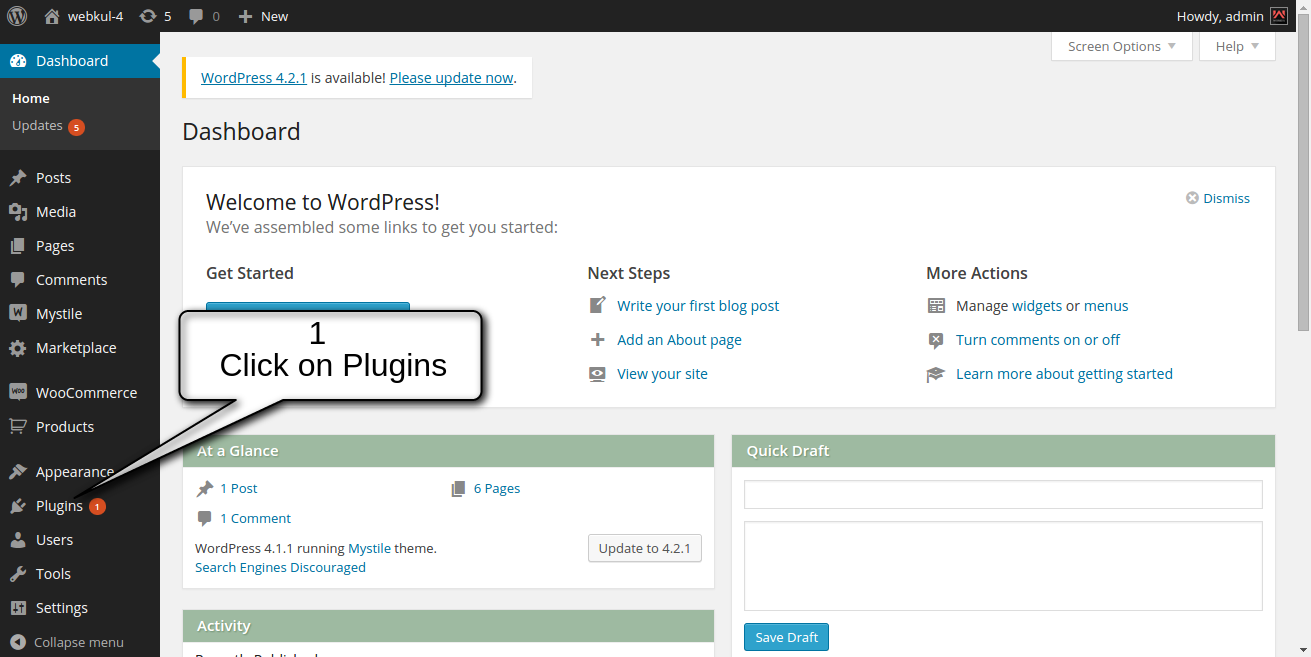
1. Goto administrator dashboard and click on Plugins.
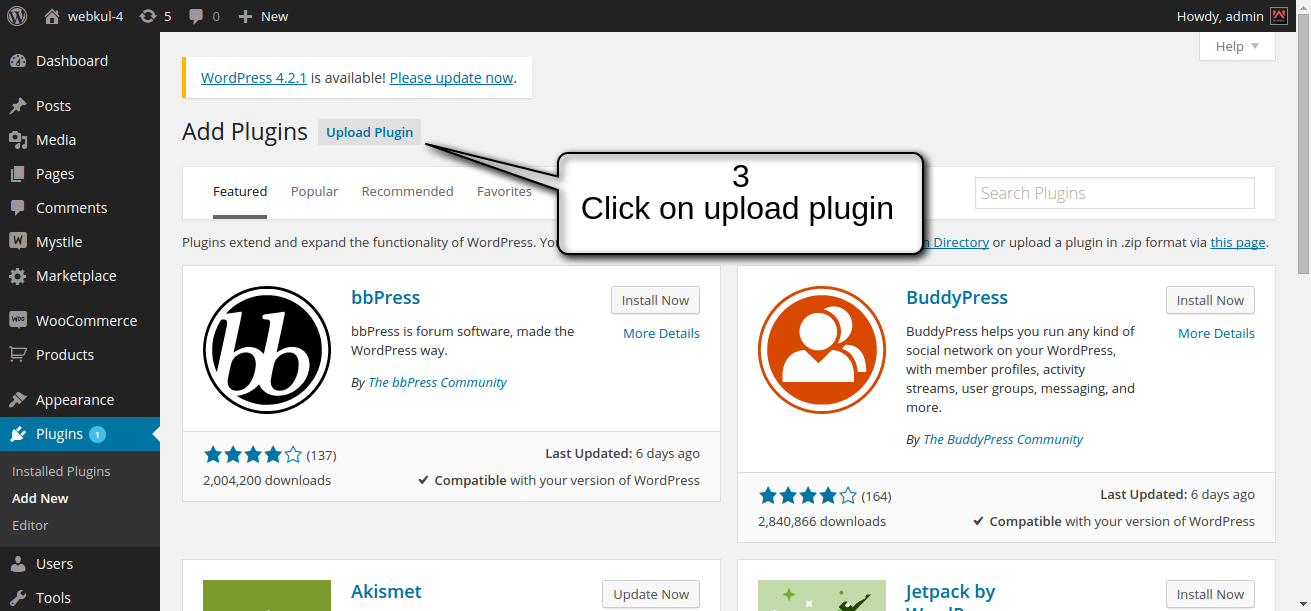
2. Now click on Add New.

3. After Clicking on Add New, Click on Upload Plugin.
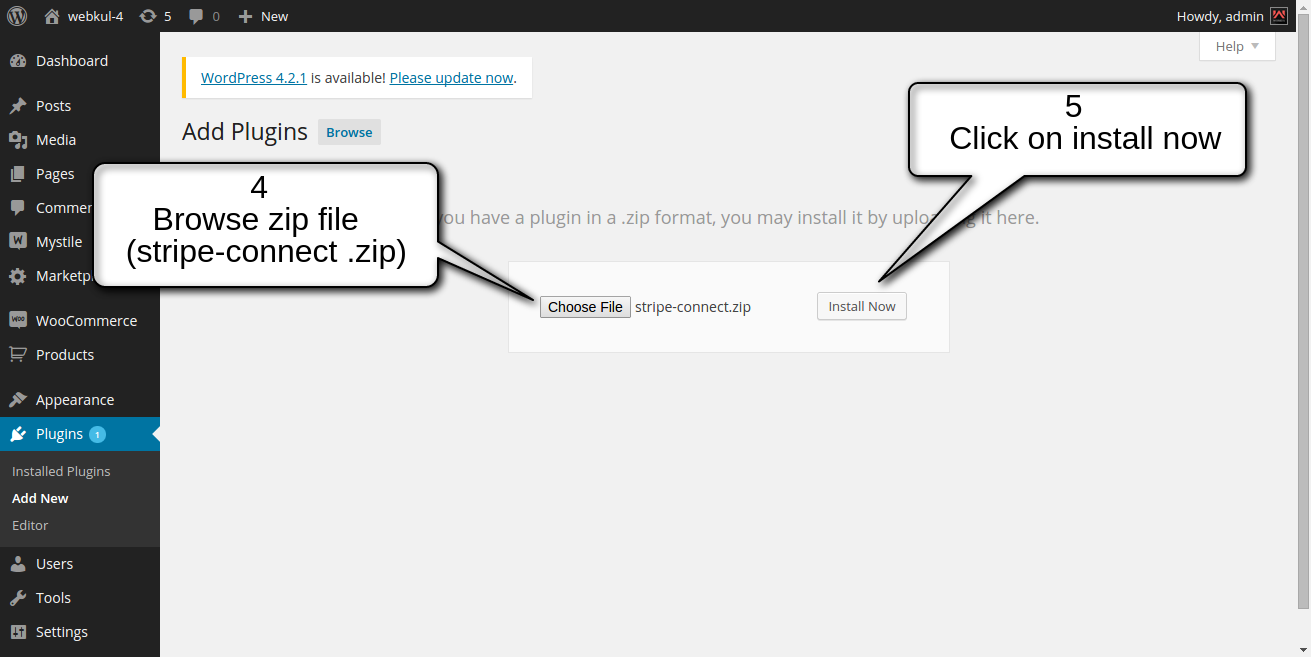
4. Now click on Choose file and Browse stripe-connect.zip
5. Then Click on install now.
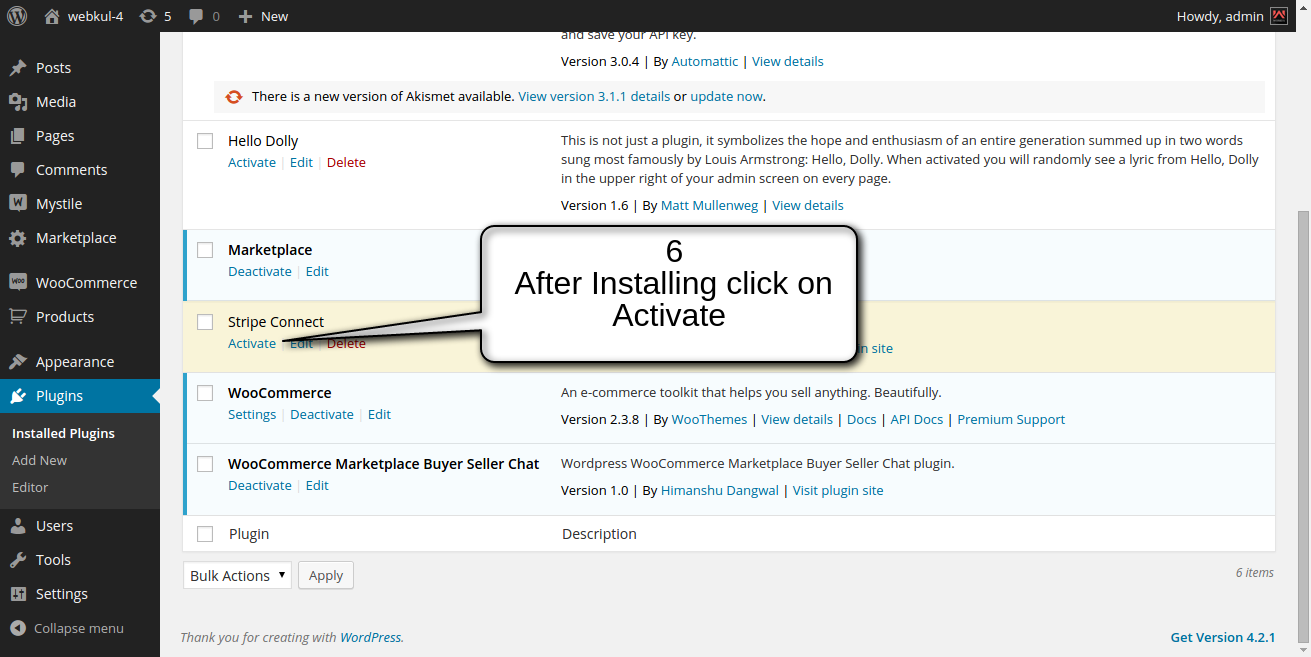
6. Now Click on Activate to Activate Plugin.
Stripe Connect:
1. Goto https://dashboard.stripe.com/account/apikeys and click on API Keys.
2. Copy the secret and publishable key for administrator dashboard on your wordpress woocommerce marketplace stripe-connect.

3. Now Click on Connect
4. Write your App Name.
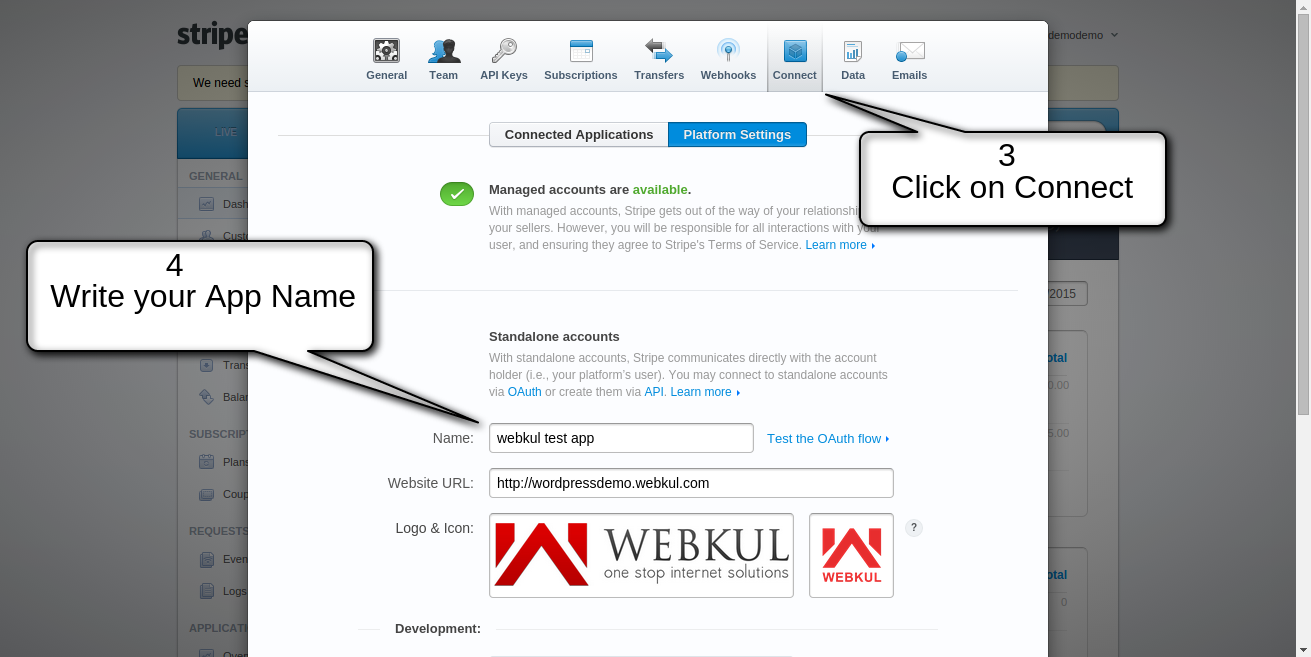
5. Copy and store Client id.
6. Write your website url following with (?page=pedit)
7. Click on Done.

Administrator End
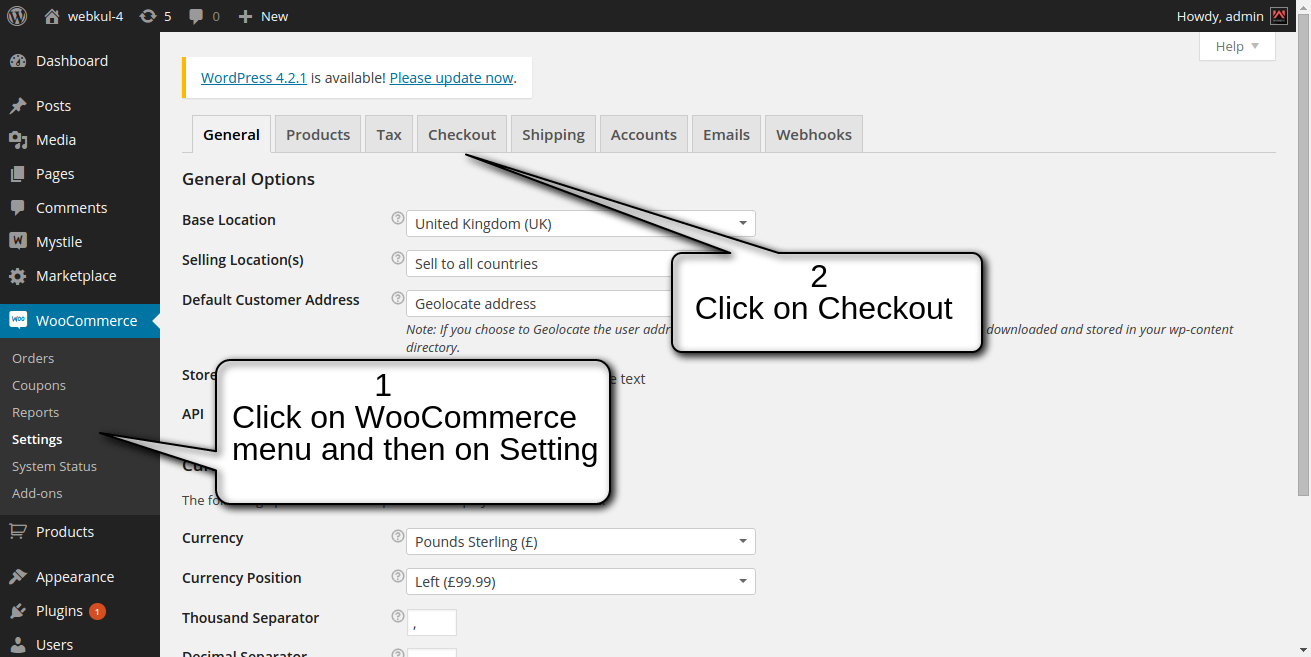
1. Goto WooCommerce menu and then click on setting sub-menu
2. Now Click on Checkout.
3. Now Click on Stripe Connect
4. You can Enable or disable this payment gateway.
5. Set all Keys i.e. platform client id (development/Production), Stripe Secret Key (Test/Live ) and Stripe Publishable Key ( Test/Live).
6. Select type of card which you want to accept.
7. Click on save chages.

Seller End
1. Login as Seller and click on Edit.

2. Now select payment method as Credit Card (Stripe Connect)
3. Click on Stripe connect button to connect with admin via stripe connect.

4. After Clicking on stripe-connect an id will be appended on payment id input box.
5. Click on update.

Buyer End
1. When buyer will checkout . Buyer has to select payment method as credit card(Stripe-Connect).
2. Fill all the card details.
3. Click on Place order.

Login Details
Seller:
Username : test
Password : test
Buyer:
Username : sudhakar
Password : sudhakar
Support
For any kind of technical assistance, just raise a ticket at : http://webkul.com/ticket/ and for any doubt contact us at support@webkul.com