The Magento 2 Canada Post Shipping extension will allow the admin to provide Canada Post shipping method for shipping the products. The customers will be able to choose this shipping method at the time of checkout for receiving their products via Canada Post Shipping. This shipping method can be used to receive the shipments within Canada and from Canada to other countries as well.
**Notes:
- The estimated delivery time shows for Canada, US, and some other International addresses.
- The shipping rates are based according to the delivery details and product weight.
- If the weight of the product is zero, this shipping method will not work.
- An active Business Purpose Canada Post account is required for getting the API credentials.
Features
- Admin can enable or disable Canada Post Shipping method.
- Admin can set the Canada Post shipping method name that will be shown from the front side.
- Admin can set packages request type.
- The origin for Canada Shipping Method must be always Canada.
- Ability to download Invoice and Shipping Slip easily.
- Provide accurate Canada Post shipping rates to customers for shipping.
- Multiple selections of Canada Post shipping methods displayed on the checkout page.
- This module can be used to ship the products from Canada to Canada, Canada to other countries.
Installation
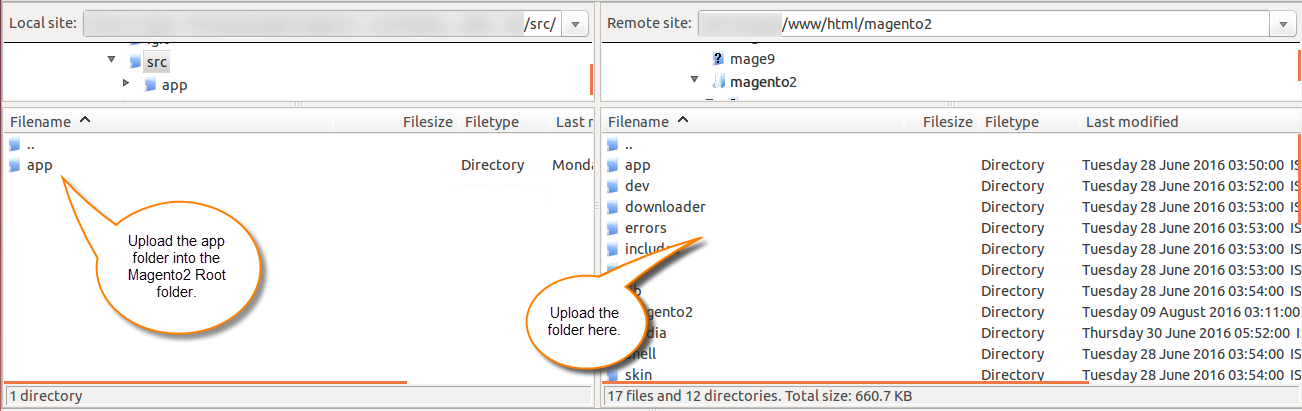
Customers will get a zip folder and they have to extract the contents of this zip folder on their system. The extracted folder has an src folder, inside the src folder you have the app folder. You need to transfer this app folder into the Magento2 root directory on the server as shown below.
After the successful installation, you have to run these commands in the Magento2 root directory:
First command – php bin/magento setup:upgrade

Second Command – php bin/magento setup:di:compile

Third Command – php bin/magento setup:static-content:deploy

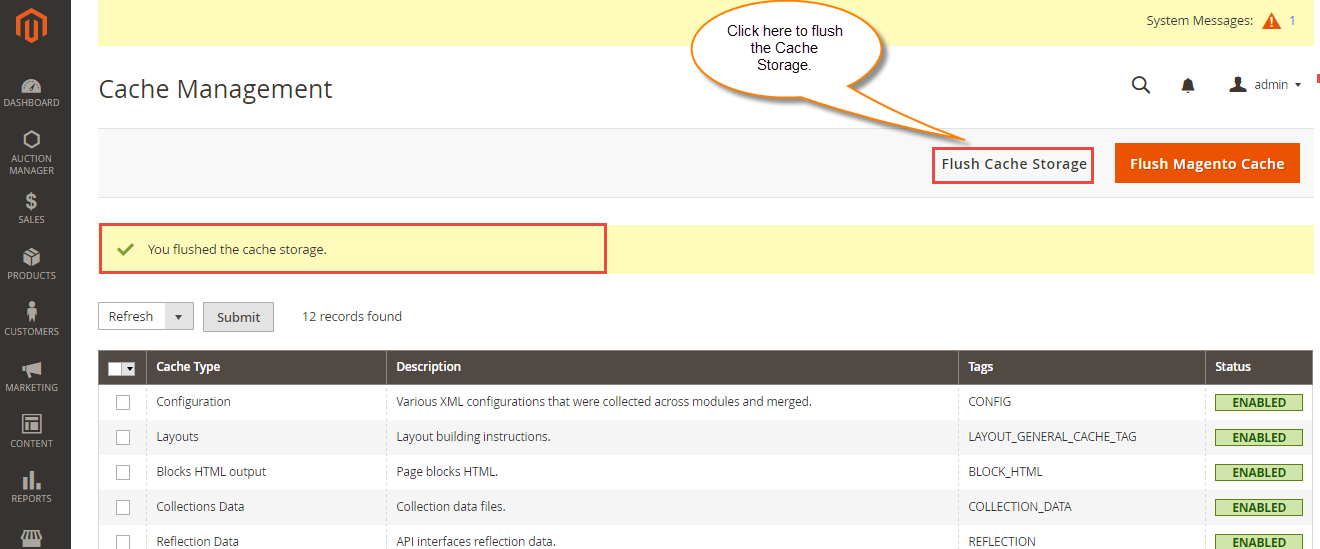
After running the commands, you have to flush the cache from Magento admin panel by navigating through->System->Cache management as shown below.
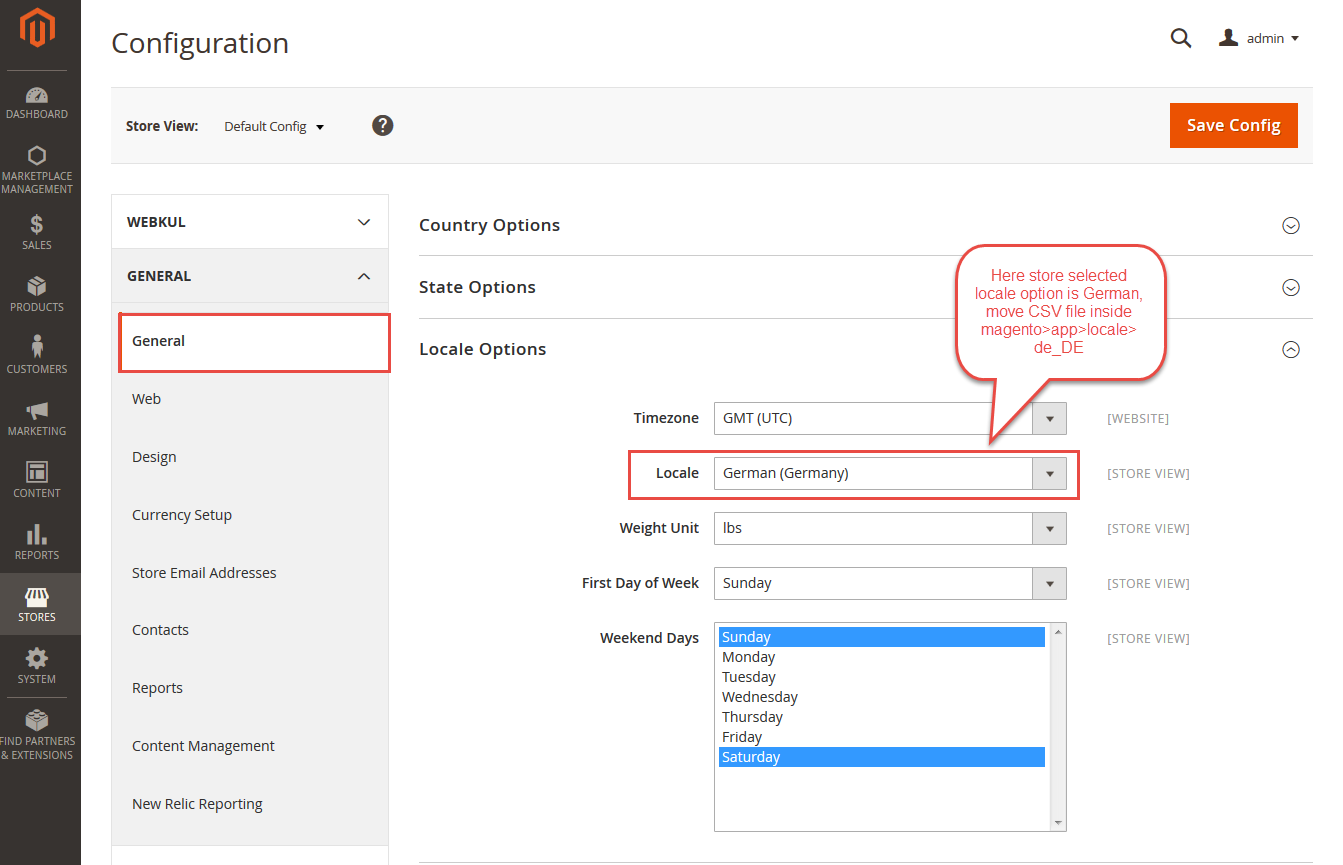
Configuration For Multi-Lingual Support
For the multilingual support, the admin will navigate through Store->Configuration->General ->Locale Options and select the locale as German (the language into which admin want to translate his store content).
Language Translation
If you need to do the module translation, please navigate the following path in your system. app/code/Webkul/CanadapostShipping/i18n. Open the file named en_US.CSV for editing as shown in below screenshot.

Once you have opened the file for editing. Replace the words after the comma(,) on the right with your translated words.

After editing the CSV file, save it and then upload it to the same folder. Now your module translation is complete.

Admin Configuration
After the successful installation of the Magento2 Canada Post Shipping module, you will be able to see the configuration panel under Stores>Configuration>Sales>Shipping Methods>Canada Post Shipping.

To generate the API User Id, Password and Client Id click the link give below –https://www.canadapost.ca/cpotools/apps/drc/home?execution=e1s1
For proper working of Magento2 Canada Post Shipping, you just need to set Canada shipping origin address from the path Stores> Configuration > Sales > Shipping Settings > Origin. Here admin can enter origin address for Canada shipping.

**Note: You need to set up the allowed currency under Stores->General->Currency Setup. Here you will have to select the Canadian Dollar under the Allowed Currencies as per the screenshot below.

Also you will have to import the currency rates under Stores-> Currency-> Currency Rates as per the below screenshot.

How to get Canada Post Credentials
Before doing the module configuration, the admin needs to have the Canada Post credentials. The admin needs API Key, API Password, Customer Number, and Contract Id (if any). Please Note: – You need Business Purpose Canada Post account to get these credentials.
Create Account:
First, click here to visit the Canada Post homepage. The following page will appear, click Sign In and then click Sign Up to create a new account.

After clicking the Sign Up, the following page will appear. Fill in the information as required. Please make sure to select Yes for Is this account for business purposes?

Now, Choose Profile Type as Small Business, and click Select and continue button.

In this step, enter your contact information- business address, phone, first & last name, job title etc. After filling in all the necessary information click Continue.

After providing the contact information, now you will get your Canada Post Customer Number. Please save this as it will be required for Opencart module configuration.

Now, you will arrive at the dashboard page after clicking continue in the previous step. Navigate to Business Solutions>Developer Program.

The following page will appear after clicking the Developer Program. Click Join Now for creating API Key and Password.

A pop-up window will appear about the Canada Post Developer Program Agreement. After reading the document, please click Agree and Continue.

Finally, you can now have your API Key and API Password. There will be two types of credentials, one for the Development (Test/ Sandbox Mode) and other for Production (Live).

Customer Frontend View
When a buyer will place an order of admin’s product, the buyer can see the Magento2 Canada Post Shipping method at the shopping cart page where the buyer can select the shipping method.

The buyer can also see the selected method under the Order Review section.

**Note: In Magento2 Canada Post Shipping module, the Shipping rate will be calculated according to the Admin’s Origin Zip Code, Product Weight, and the Buyer’s Destination Zip Code.
Now, after placing the order the customer can find the order details under the “My Orders” section. The customers can see the details of the selected shipping method with the estimated delivery time(If the admin has set to show the estimated delivery time).

Admin Management
Now the admin can view the order details under Sales-> Order and here the admin can generate invoices for the ordered products, generate shipment for the order of the products. Even the admin can notify the customers by sending them emails, cancel/hold the order and even edit/reorder the product order.

After viewing the order, the admin will create the invoice for the order. The invoice will contain all the shipping information and cost of shipping for that particular order.

After creating the Invoice, the admin will create the shipping for the order by clicking the Ship option. Here, the admin can generate the shipment by checking the “Create Shipment” option and then clicking the “Submit Shipment” button.

Clicking the Submit Shipment button brings a section to create packages. Click the “Add Products To Package” button to add products to the package.

After clicking “Add Products to Package“, you have to check(select) the products to add to package and then click the “Add Selected Products’ to Package” button to add the products.

After adding the products to package, just click the Save button to save the configuration as shown below in the snapshot.

Now, the admin can generate the shipment label by navigating to the shipments section for the order and clicking the “View” link.

Here, the admin will click on the “Print Shipping Label” to print the shipping label as shown below.

1. Canada to Canada Shipping label –

2. Canada to US Shipping Label –

That’s all for the Magento 2 Canada Post Shipping extension. Still, have any query or doubts regarding the extension just get back to us with your views at webkul.uvdesk.com