CS-Cart Culqi Payment Gateway:
This impressive add-on integrates a secure payment gateway Culqi with CS-Cart. This allows users of the store to pay via Culqi. It is the reliable payment solution and monitor transactions in real time. This payment gateway accept credit and debit cards for payment on your store.
Features
- Well integrated with CS-Cart Multi-Vendor.
- User friendly interface to receive online payments.
- Protects your business with a solid anti-fraud platform and intelligence.
- Provides fully secure payment to handle risk management system.
- Admin have complete control of the system.
- Easy to configure and manage at admin end.
How To Upload and Install
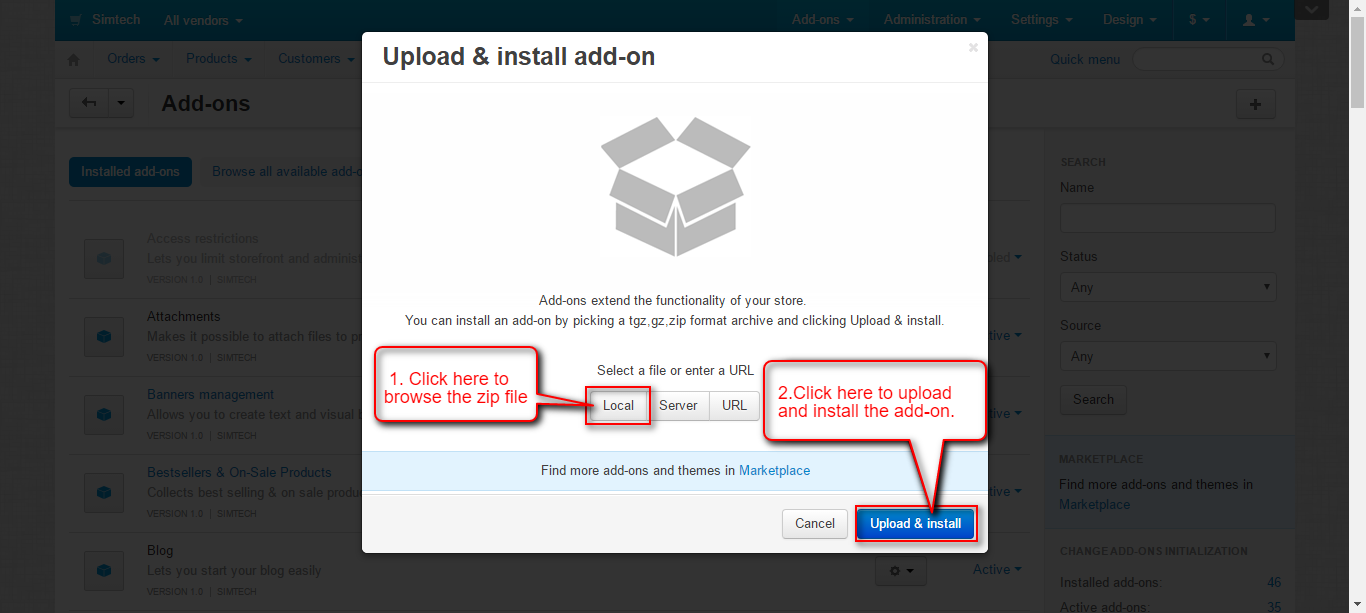
Go to “Manage add-ons”, click on “+” to upload and install the zip file as shown below.

Click on “Local” to browse the zip file and then click on “Upload & Install” as shown below in snapshot.
Back End View
Go to “Administration” tab and click on “Payment methods”.

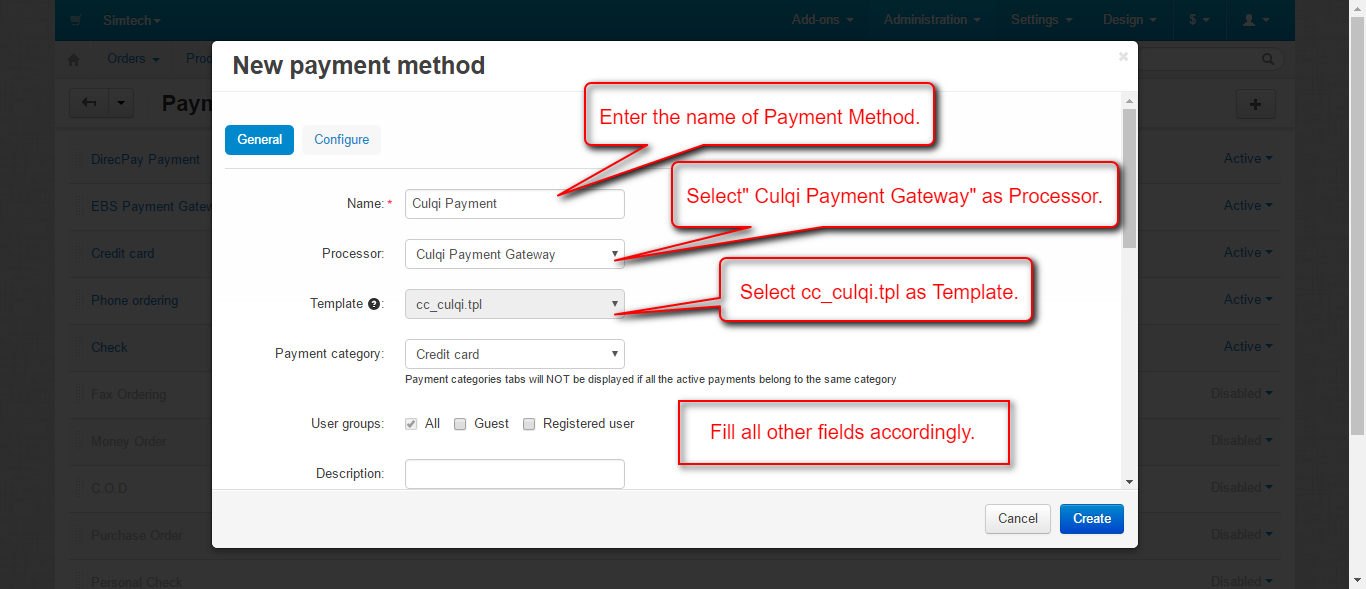
Click on “+” to create a new payment method.

Set the parameters as shown below in the snapshot.
- Set the name of the payment method.
- For checkout choose the processor as “Culqi Payment Gateway”.
- Select template as “cc_culqi.tpl” from the dropdown.
- Configure the tabs accordingly as shown below in the snapshot.
Click on “Configure” and set the parameters as shown below in the snapshot.
- Select currency for payment via Culqi.
- Enter credentials for Culqi Payment Gateway.
- Write down the name of company which will be displayed on the payment form.

- Enter the short description of company to be displayed on the payment form.
- Select the order status for successful and failed transactions.
- Click on “Create” Button to create the payment method.

Once the Payment Method is created and configured, customer will get the option at front end to pay via Culqi .
Front End View
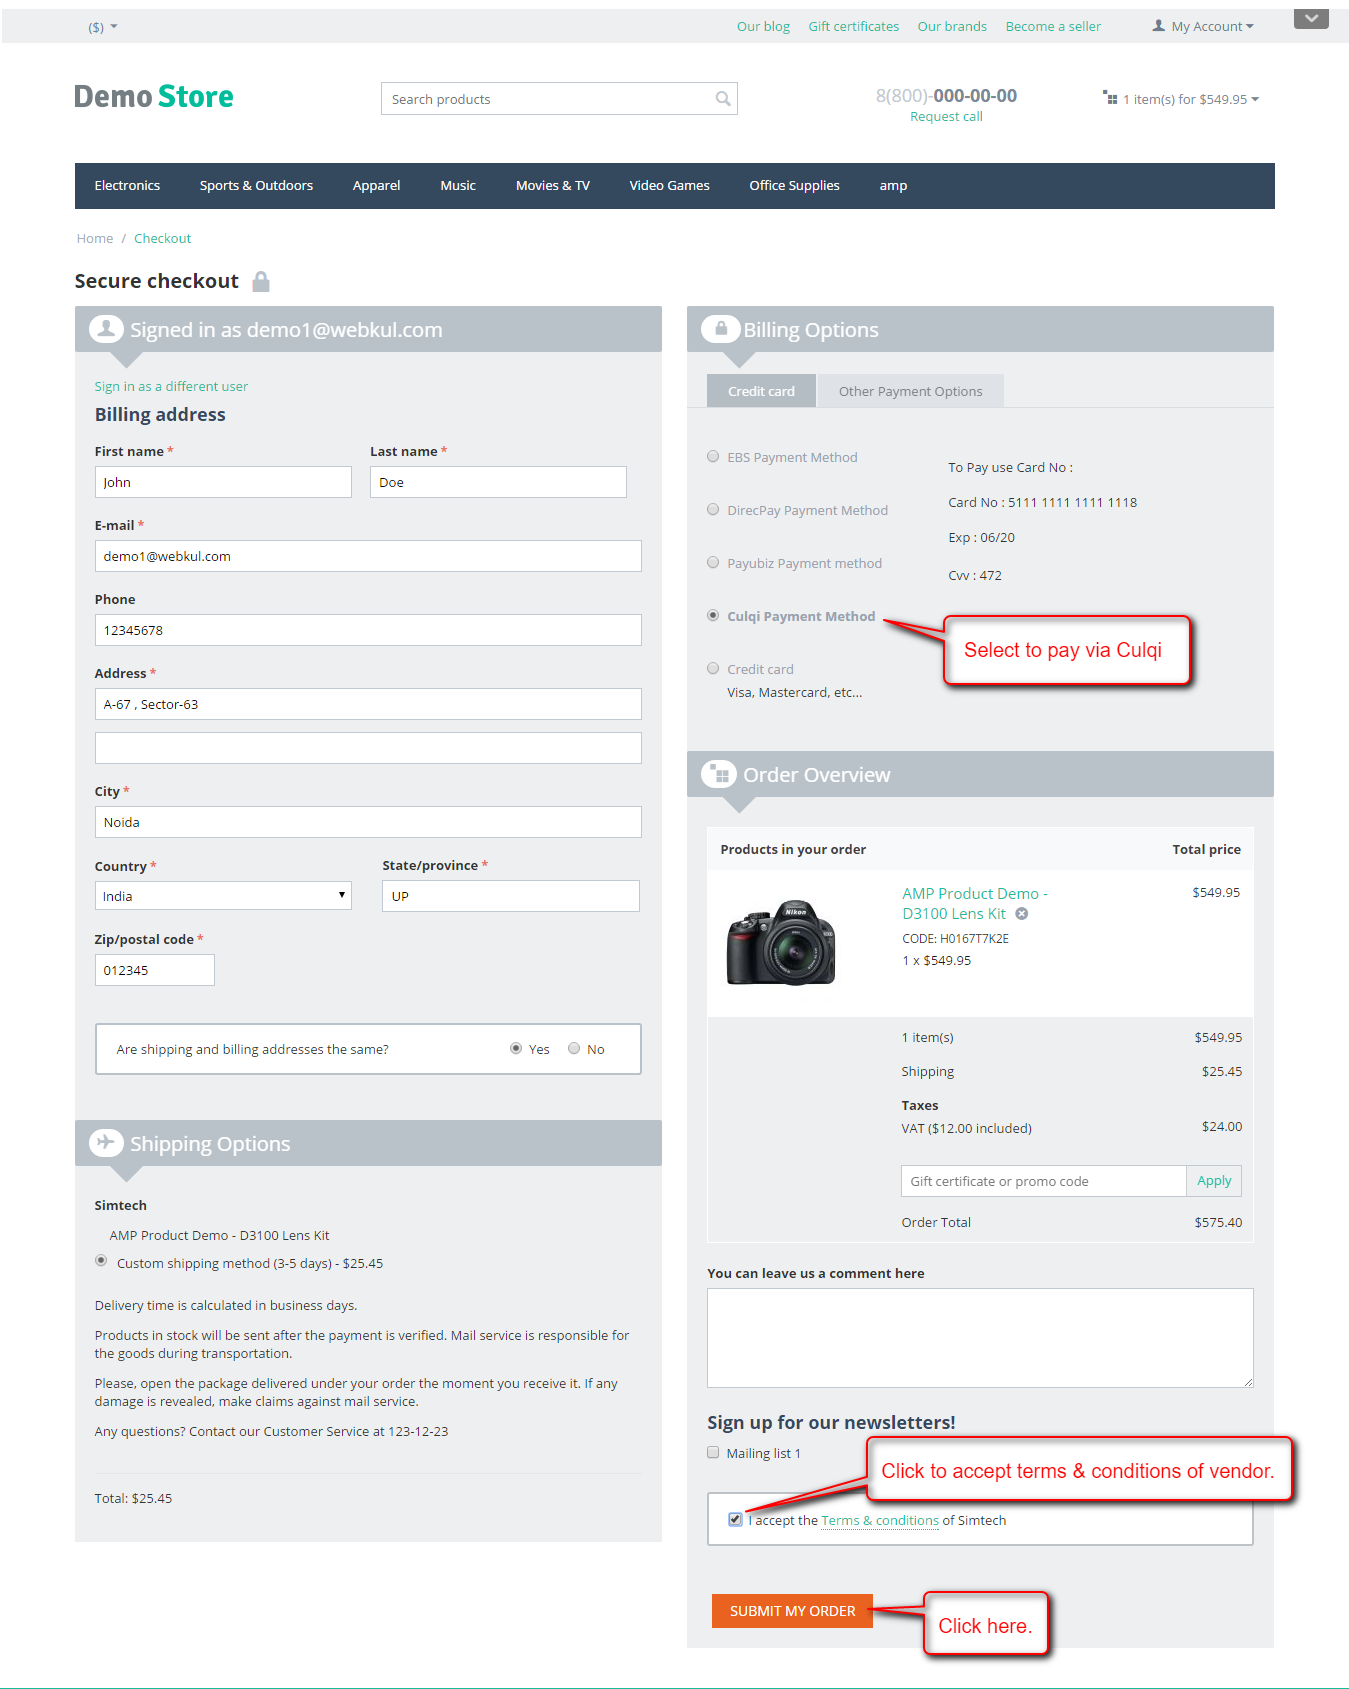
For payment via “Culqi Payment Method”on checkout page select the option as shown below in the snapshot.
- Click to accept the terms and conditions of vendor.
- Click on “Submit” button to submit the order.
![checkout]()
On clicking Submit My Order button, customer will get a popup form to enter the card details for payment as shown below.
After filling card details, click on the button to pay as per the below screenshot. 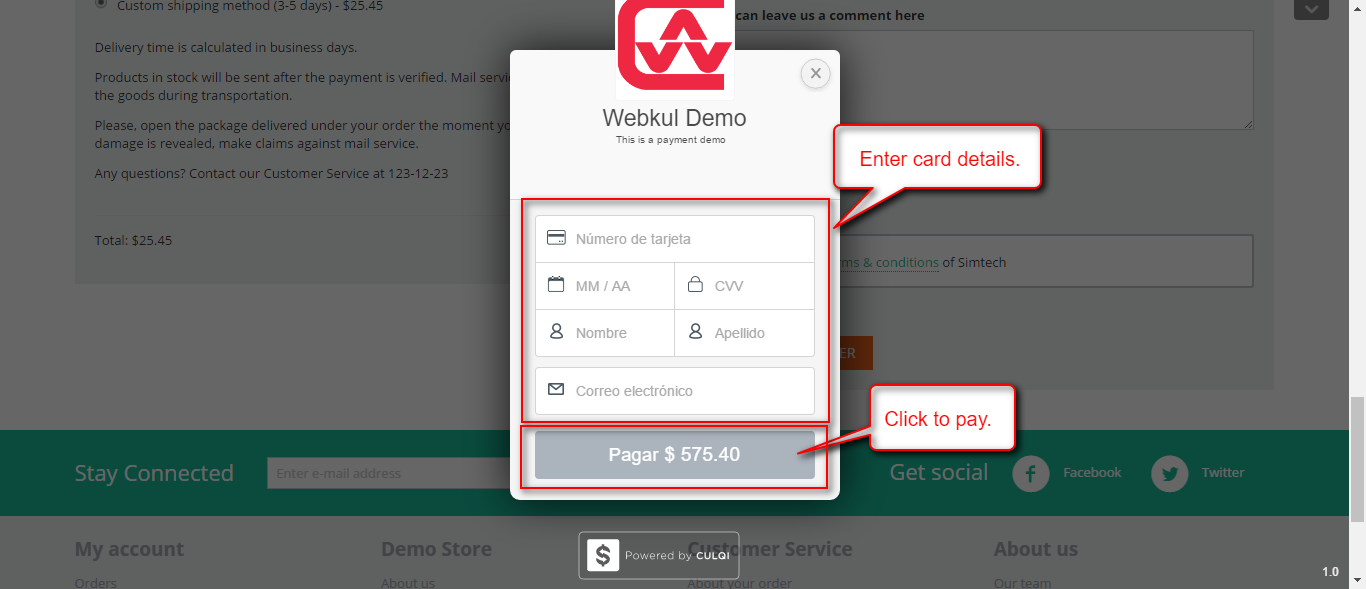
Support
This is all about Culqi Payment Gateway. For further any query feel free to contact us at http://webkul.uvdesk.com